If your frozen breast milk smells or tastes off – sour, soapy, or like metal – you may have something called excess lipase in your breast milk. This is annoying but manageable – here’s how to scald your breast milk and manage exclusively pumping with excess lipase.
This post may contain affiliate links, which means if you click a link and purchase something, I may make a small commission at no additional cost to you. I only recommend products I love! More information here.
What does it mean to have excess lipase in breast milk?
Lipase is an enzyme that breaks down the fats in your breast milk. This helps your baby digest the fatty parts of your milk.
However, extra lipase can speed up this process, which can make the milk taste sour or soapy after some time has passed. Other descriptions include breast milk smelling like vomit, or eggs, or metallic.
Excess lipase is not an issue while nursing or feeding fresh breast milk, only milk that has been stored for a while.
Breast milk with excess lipase is actually safe for your baby to drink! However, he or she may refuse it because of the taste.
Does having excess lipase affect refrigerated milk, or just frozen milk?
It can affect any milk that’s not fed right away, but because lipase acts over time, the newer the milk, the less likely it is that lipase will be an issue.
How do I know whether or not there is too much lipase in my breast milk?
If your baby refuses your frozen or refrigerated milk, but will take your fresh breast milk, it’s a good idea to taste a drop or two of the milk your baby won’t eat and compare it to a few drops of your fresh breast milk.
If your milk tastes different, excess lipase is the most likely culprit – particularly if the older milk tastes sour or soapy.
How quickly will excess lipase make my milk go off?
This is different for everyone – for some people, it’s within hours. Others only see it in older frozen milk.
To find out, one thing that you can try is testing your milk every hour to see when the taste starts to change.
This will be helpful in two ways – first, you can confirm it’s not an issue with your milk storage in general (such as your freezer not being cold enough).
Second, you can see how quickly you need to scald your breast milk. Scalding will allow you to store your milk for longer than you otherwise would.
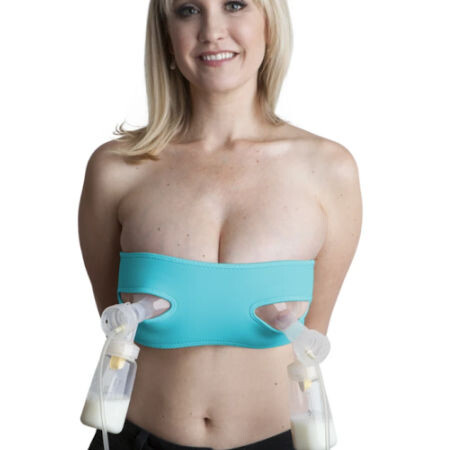
Hands-Free Pumping Bras


So scalding my breast milk will fix my excess lipase issue?
Yes, heating fresh breast milk very soon after pumping to about 180 degrees Fahrenheit (82 degrees Celsius) will inactivate the lipase.
Doesn’t scalding breast milk remove the nutrition from it?
It may lower some nutrient levels and does destroy the antibodies, but as long as all of the milk your baby gets isn’t scalded, it should be okay. Talk to your pediatrician if you have any concerns.
After scalding, you can refrigerate or freeze the breast milk, and the taste won’t go off for a much longer period of time. (More info on how to scald breast milk below.)
Is exclusively pumping with excess lipase possible? Do I have to scald all of my milk?
If you are exclusively pumping with excess lipase, feeding freshly pumped milk whenever possible is your best bet, because you won’t need to scald the milk.
In addition to the extra work of scalding, there’s a decent amount of cleanup involved as well as the considerations about nutrition noted above.

To feed fresh milk while exclusively pumping, you can pump right after (or while) your baby eats, and then feed that milk at his next feeding a few hours later. Then you’d pump again, and keep repeating the cycle.
Obviously, you’ll want to make sure that the length of time your milk will be out (the time between pumping and feeding) is less than how long it takes it to go off, but for most people a few hours will be okay.
Need help with exclusive pumping? Use EPUMP30 for 30% off

I have a freezer stash and just discovered I have a lipase issue. What can I do?
Unfortunately, once milk has gone “off,” scalding the milk will not help. However, you may be able to convince your baby to take it.
(Remember, milk that tastes bad due to excess lipase is safe to drink. They just may not want to, for obvious reasons.)
Your best bet is to try mixing the “lipase milk” with fresh milk to see if your baby will take it. You can try any variation – fresh milk with just a splash of lipase milk to half and half, etc. The risk is that you might have to throw out the fresh milk that you use to experiment with this if your baby won’t take the mixture either.
More on ways to get your baby to take lipase milk here.
Even if your baby refuses to take it, your lipase milk does not have to go to waste. In most cases, you can probably donate it to a milk bank. Donor milk is often fed through a tube, so in those situations, the babies that use the milk aren’t tasting it anyway.
What is the best way for me to scald breast milk?
You can save newly pumped breast milk by scalding when it’s freshly pumped. Below is a photo tutorial on how to scald milk on the stovetop or using a bottle warmer without auto shut off.
As noted above, there are two ways to do this, on the stovetop or in a bottle warmer.
On the Stovetop
To scald breast milk on the stovetop, you will need:
- A bowl or other container large enough to fit some ice and a bottle (for an ice bath)
- Ice
- A stainless steel bottle
- An instant read thermometer
- A clean saucepan
- A container (bottle or bag) to store your breast milk when you’re finished scalding it
Once you have all of that, follow the below steps to scald your milk.
1. Prepare an ice bath
Just put a bunch of ice and a little water in a small bowl.

2. Pour your freshly pumped breast milk into a clean saucepan on the stove.

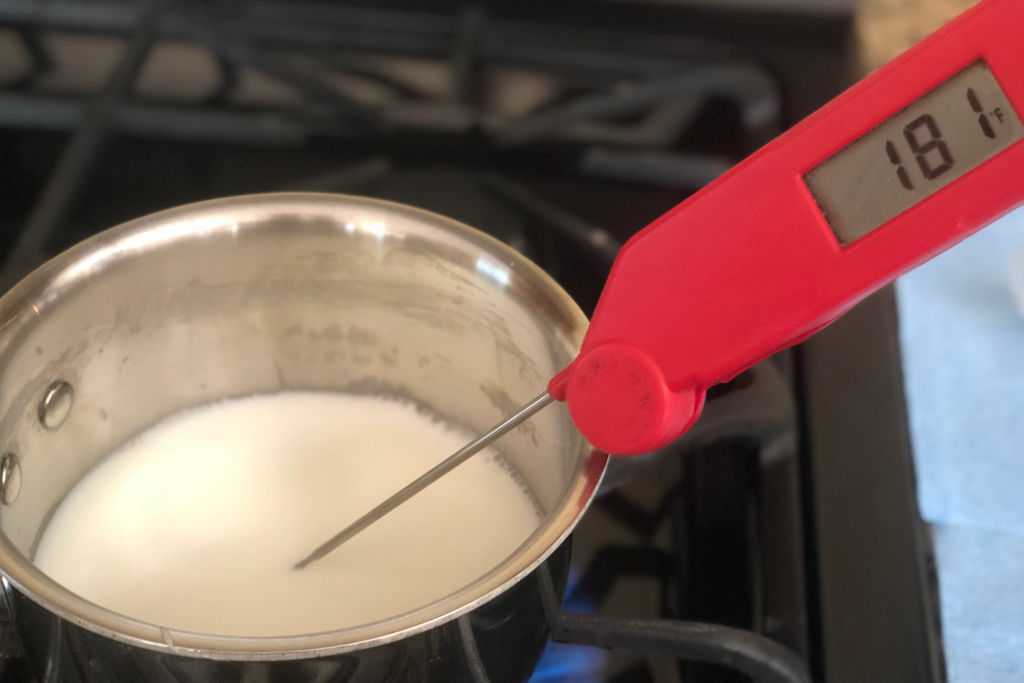
3. Heat the milk to 180 degrees Fahrenheit.
An instant-read thermometer helps here – it’s not a bad idea to get one just for scalding breast milk. However, if you do use it for other things, it’s very important that you sterilize it before use.
There should be bubbles around the edges, but not a rolling boil.

4. Remove from heat
When the milk reaches 180 degrees, remove it from the heat and pour it into a stainless steel bottle in the ice bath. Use one of your flanges as a funnel to avoid spills.

5. Store scalded milk
After it’s cooled, put the milk into a storage container (a bottle or breast milk freezer bag) and immediately store it in the refrigerator or freezer.

Below is a short infographic on scalding breast milk that might be helpful to screenshot.

In a Bottle Warmer
To scald breast milk in a bottle warmer, you will need:
- A bowl or other container large enough to fit some ice and a bottle (for an ice bath)
- Ice
- A stainless steel bottle
- An instant read thermometer
- A bottle warmer without auto-shutoff (to allow you to heat to 180 degrees)
- A container (bottle or bag) to store your breast milk when you’re finished scalding it
Once you have all of that, follow the below steps to scald your milk.
1. Prepare an ice bath.
2. Put milk in the bottle warmer
Put your milk in a stainless steel bottle in the bottle warmer.
Use one of your flanges as a funnel to avoid spilling, and start the bottle warmer.

3. Monitor the temperature
Stir the milk using your (sterilized!) instant read thermometer until the temperature reaches 180 degrees.

4. Remove the bottle from the warmer
When the temperature reaches 180 degrees, remove the bottle from the bottle warmer and put it in the ice bath.

5. Store the milk
After it’s cooled, put the milk into a storage container (bottle or breast milk freezer bag) and immediately store it in the refrigerator or freezer.
Miscellaneous tips on scalding
Why use a stainless steel bottle instead of a regular one? I don’t like the idea of heating breast milk to that high of a temperature in plastic, even if it’s BPA-free, and stainless steel holds up better than glass to transferring between very hot liquid and an ice bath. However, you can experiment with other options if you like.
In terms of which method to use – I found the stovetop method much faster and easier than the bottle warmer, but a bottle warmer would probably be more workable at the office.
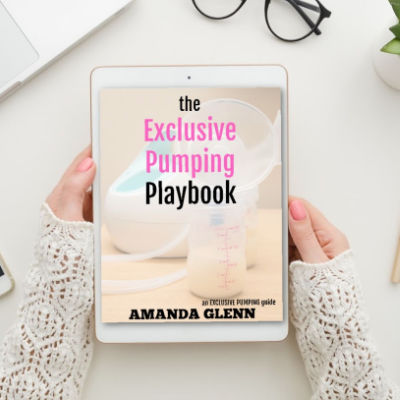
Note: Finding out you have excess lipase can be super stressful. Rebekah Hoffer has written a fantastic, affordable e-book about her personal experience with it, including how she managed scalding milk on a day-to-day basis, what she did with her “lipase milk,” and all the emotions she went through. It also has some printable sheets you can use to test your lipase milk to see how long it takes to go off. I think it’s a great investment if you have just discovered you have excess lipase as you figure out your system going forward. You can check it out here.
Have any tips for exclusively pumping with excess lipase? Leave them in the comments!
- Williams, Christina. “Battling and Resolving Excess Lipase in Breastmilk.” https://www.sdbfc.com/blog/2012/9/4/battling-and-resolving-excess-lipase-in-breastmilk
- Bonyata, Kelly, IBCLC. “My expressed breastmilk doesn’t smell fresh. What can I do?” https://kellymom.com/bf/pumpingmoms/milkstorage/lipase-expressedmilk/


Comments & Chitchat
Hi!
A couple of questions.
How quickly does the milk need to cool down after scalding? I would think it may take a while to cool milk in stainless because it holds the temperature so long. So you just cool to room temp and then fridge or freeze it immediately? Or does it need to be cold before fridge or freezer?
You’re totally fine to “batch scald” cold milk at the end of each day as long as it hasn’t gone off yet, right?
And once you freeze scalded milk, you can thaw and warm in a bottle warmer later on right? I think I’m stuck on the “once you’ve heated milk you can’t reheat it” thing.
Do NOT put in stainless steel for an ice bath. It will not cool down. Use Pyrex. 5 ounces down the drain…. 😡😡
Can you have a lipase issue with one child and not another? My oldest (12 year old) nursed for four years. He didn’t care where the milk came from or how old it was…. bottle, breast, sippy cup, he drank it all! My 18 month old has been giving me trouble since he was born with taking expressed milk. I didn’t realize until recently that it’s just the frozen milk.
I noticed that when I warm my milk (especially older milk), the fat doesn’t mix in well like it does with freshly pumped milk. Is this a symptom of lipase issue or does all milk do this?
I don’t think my milk tastes soapy, as some have described with a high lipase issue. I think it tastes sour. Is this, in fact, still a lipase issue? I’ve tried milk from 1, 2, 6, 9, 12 months ago and the foul taste gets stronger and stronger with aged milk.
Hi Diana! Yes, this can definitely happen. I’m so sorry!
I’m not sure about your question about warming – I had not heard that before about lipase milk, but I would guess it’s possible. I’m sorry I can’t give you a clear answer!
Sorry to storm in your old comment but my answer may be valuable to other readers that come along. It is not you milk that changed, it is the baby! Some babies are not bothered by the taste of high lipase milk, others hate it. It just depends on your child.
Definitely it can taste sour to you. Or soapy.
I defrosted scolded milk and the fat would never mix into the milk ( not like fresh). It stayed broken up into little pieces. I used the bottle warming method and followed instructions above. The milk left a greasy residue too. Advice? Thank You!
Hi,
For my first son I went through the process of scalding my milk using the stovetop method, complete with ice bath. With my second son, I’ve been trying to save time (what with having a preschooler and newborn), so I have been placing scalded milk directly into storage bags and then directly into the freezer to cool. This eliminates the ice bath and all the transfers to/from the various containers. Is this a bad idea? What are the concerns with doing this? Thanks in advance!
Hi Danielle! I don’t know of any issues with this. (That doesn’t mean there aren’t, but I can’t think of any.) Sorry, I wish this was more helpful! I feel like there isn’t enough information on this.
Thank you so much! Could I use a glass bottle instead of a stainless steel one to cool the milk?
Yes!
I would just be cautions of the glass breaking or cracking from the extreme heat to extreme cold. 🙂
Is there a way to prevent the lipase issue through diet?
Hi Heather! Not that I know of, I’m sorry!
How long is the scalded milk good for in the fridge? I plan on using that milk the next day rather than freeze it but wasn’t sure how long the milk can be in the fridge before it’s not safe to give. I didn’t know if we could follow the same guidelines on storing breast milk since we’ve heated it (freshly pumped breast milk refrigerated up to 4 days).
Thank you for all the information!
Hi Carolyn! If you scald it when it’s freshly pumped, my understanding is that the guidelines are the same. I think the next day should be fine. Hope that helps!
Hello,
I pump every four hours and I produce about 6-8 ounces each time and I have a 1 month old and a busy 3 year old. So if I have to scald my extra fresh breast milk every four hours, it would be close to impossible 6 times a day— and in the wee hours of the morning.
I’ve tried to look for info everywhere and your website seems to be the only one that has comes close to answering it:
Can I scald breast milk that has been refrigerated from 1-5 days?
I feel comfortable scalding 1-2 day old milk but I currently have 40 oz that’s 3-5 days old. My milk takes long to turn soapy. Is it ok to scald milk as old as 5 days?
Another thought.
I’m an ICU nurse so when I go back to work in 4 months I’m probably not going to pump at work because of this COVID thing. So my son will eventually ONLY have scalded frozen breast milk. If sources say that giving ONLY SCALDED BREAST MILK is not good because it has lost the antibodies and some nutrients is there even a point in scalding my breast milk if I can only exclusively give ONLY SCALDED MILK in 6 months? What’s the point of working so hard now if it won’t pay off later because I’m not suppose to give ONLY SCALDED MILK?
Hi Aurelle! So on the first question – if the milk hasn’t gone off yet, yes, you can scald it later. It just depends on your milk. Some moms’ milk goes off in a few hours, others takes days. You just have to test it and see what your baby will take.
Do you plan to wean completely when you go back or just not pump at work? Were you planning to formula feed OR just feed scalded frozen milk?
Thanks for all you do as an ICU nurse!
This is really informative, thankyou! Personally, as a working pumping mamma I am facing this now in regards to stored milk in my fridge. I am testing out how many bottles I am able to store without them turning, but what it means is I am not effectively able to stock up on pumped milk or be ahead with my stash, all of which is of the essence to a busy working mum!
Scalding the milk is really not an ideal scenario- logically the milk is being deranged and most of the nutrition removed- I would be better off giving formula to my baby than feeding nutritionally void breast milk. I think it’s important to recognise with breastfeeding and pumping when it’s time to throw in the towel- this would definitely be one of those scenarios for me- particularly since for me it’s happening at a time when baby is 9 Months Old and partially on solids. These days there is a huge emphasis on breastfeeding, but we should be doing what is truly best for the baby at the end of the day. In my view, an issue like this signals that you’ve given it a good go, but your baby needs nutritionally complete food in a way that works for a working family. I actually think formula should be suggested before scalding breast milk and removing nutrients.
I accidentally raised the temp of my breast milk to 195 while scalding it. Is it ok to freeze and use or do I need to dump it?
Hi HC – I think it’s probably fine to use. You can always freeze it and stir it into solids later if you’re concerned.
Can I scaled milk at the end of a work day? Will that stop the lipase? I pump 3 times a day at work and I don’t have access to a kitchen. Just wondering what my options are.
You can test it and see if it works! Some women find their milk goes off quickly and others have more time. If you find you don’t have a lot of time I would do it with a bottle warmer. 😊
Hi!
If your baby takes the milk, even if milk has (high) lipase, it’s still okay for them correct?? From reading every on this page it seems to be the case. I just want to be sure.
Also a comment from VANESSA on 8/2019
Said:
I did realize that if you do not mix the milk after storing in the refrigerator (you’ll see the fatty part of the milk at the top), the taste is A LOT better. So I put the milk in storage bags, take as much of the air from the bag as I can, and make sure no one touches it or shakes it before feeding to my baby. Tastes just like fresh milk.
But wouldn’t the fat on top of milk move once you poured into the bottle from bag? Or in my case I pump into Medela bottle then pour warm milk into Bimbie bottle? I just need vilification please.
Lastly from what I know you’re never suppose to shake breast milk only swirl the milk after it has been warmed up.
Hi Vilma,
That’s correct!
Regarding the shaking/swirling thing – I’ve read that that’s been debunked? I’m not 100% sure, but I don’t think shaking will do anything all that bad. http://www.yourbreastfeedingguidebook.com/blog/2015/6/4/the-milk-shaking-controversy
PLEASE READ IF YOU HAVE HIGH LIPASE! I went through high lipase with both kids for 1 year of breastfeeding each. It was horrible the first time. Being a new mom and scalding milk regularly is A LOT.
I talked to my pediatrician and you can actually just mask the taste with alcohol free vanilla (bought mine from whole foods). The ratio I use is roughly 1 eye drop per ounce. This saved me a TON of time. My 1st LOVED vanilla milk and my second tolerates it.
It is a much easier solution if you don’t want to scald AND means you can use your freezer stash.
**Formula also makes the taste and we did a lot of combo bottle – half formula half breast milk at the end of our journey 🙂
Hope this helps someone like it helped me!
I used vanilla when switching number 1 over to formula to help the transition and it really was a miracle. I like this idea for an alternative to scalding and will discuss it with my IBCLC. Thanks so much for the tip!
Hello mommas! I have high lipase in my breast milk, scalded it with my daughter until I had to supplement with a bad tasting formula (she had allergy to milk protein) and she took it all with no issues. I then gave her non-scalded milk (she was 19 months old then) and she took it with no issues.
Now I have a 2 month old and decided not to scald it. However, I got him used to it from week 2. I would alternate nursing him and giving him a bottle with breast milk from the day before. However, I did realize that if you do not mix the milk after storing in the refrigerator (you’ll see the fatty part of the milk at the top), the taste is A LOT better. So I put the milk in storage bags, take as much of the air from the bag as I can, and make sure no one touches it or shakes it before feeding to my baby. Tastes just like fresh milk. I’ve tested it with milk that was in the fridge for 3 days! Try it, it might work for you too!
Hi, I just wanted to leave a comment for other mothers in a similar situation.
I exclusively pumped for 7 months, then weaned. (Many thanks to this website — it got me this far, through several clogs and bouts of mastitis, and then through weaning!)
I discovered already in the first month of pumping that my milk was high lipase, but I chose not to scald it. I had oversupply, so after donating a batch of milk to a friend who had undersupply, I have saved enough frozen milk to give my baby 75% milk and 25% formula for months 7 through 10. Then we’ll switch to 100% formula.
My baby’s now on week three of freezer milk. It tastes disgusting to me — soapy and metallic — but she’s one of the babies who still (fortunately) doesn’t seem to mind. My friend’s baby also didn’t mind the frozen milk. So you may find that your baby is okay with it! (Sorry to those of you whose babies have more refined tastes!)
When I donated some of my early milk, I talked with both the NE Milk Bank and the Indiana Milk Bank. They are not worried about high lipase, but they do strongly prefer that you do not scald the milk yourself. They instructed me to freeze it as is. So I decided that if my baby ever decides to reject the high lipase freezer milk, I’ll just switch to formula and donate the rest.
So for anyone else contemplating donating some of your stash, it would be better not to scald it.
Thank you so much for all this great information Nicole!
I have the advent warmer- what setting do I use and how much water ? Also I scalded on the stove and put in ice bath and then put directly in the freezer once cooled ? Is that wrong ? Am I supposed to refrigerate before freezing?
Hi! I used the highest setting with as much water as would fit with the bottle. I would cool before freezing. Good luck!
My heart dropped when you said it’s too late now I’ve I just discovered my baby won’t take my frozen milk. I did a test run before stashing all the milk I have now and she did fine. I also pumped and always gave her milk pumped from the day before – rarely same day pumped milk. And now that I stopped pumping and am give her my frozen stash everything was fine until this week (week 2 of frozen milk) when she refused my milk. I don’t know what to do. I tasted the milk – doesn’t taste bad and no soap odor. I am considering giving her half my milk and half formula to disguise the taste if that’s the issue? Any suggestions?
I have this bottle warmer but the water only heats to 93 degrees f. Any tips?
It took me a LONG time – like 10 minutes – to get the milk warm enough. How long are you letting it run?
I use the Munchkin High Speed Bottle Warmer and it hits the 180° mark within a few minutes.
Can you freeze scaleded milk AFTER it’s been refrigerated and can you scaled milk AFTER it’s been in a cooler? I will be traveling for work and will be staying in a hotel with a fridge. I’d like to scaled the milk I pump in my hotel, but I’m not sure if I can scaled the milk in that has been cooled beforehand during the day.
Hi MK! Yes to question #1 – you can scald the milk, refrigerate it, and then freeze it. For #2, it depends on how quickly the taste of your milk goes off. If it’s still okay, you’re fine to scald it later. Some people’s milk goes off in an hour or two, other women’s takes longer. Hope that helps!