Are you getting ready to send your baby to daycare? Here’s everything you need to know about how to prep breast milk bottles for daycare – how to pack bottles, how to label them, and how to send them to daycare.
 This post may contain affiliate links, which means if you click a link and purchase something, I may make a small commission at no additional cost to you. I only recommend products I love! More information here.
How does your daycare want you to send breast milk?
First, it’s a good idea to ask about your daycare’s policies for sending breast milk. Each daycare will have a different system or rules.
For example, some of the the systems that I’ve seen include:
- Most daycares will want you bring in prepped bottles that are ready to feed.
- Some may ask you to bring in clean bottles and bags of frozen milk.
- Other daycares may want you to bring in one clean bottle for feeding and Thermos-type container of milk that they will pour into the bottle.
Find out as early as you can what your daycare’s rules and procedures are for breast milk, because it might influence what you do before your baby starts there. (For example, some daycares require frozen breast milk bags to be labeled in a certain way.)
How to prep bottles for daycare
Here are my tips and tricks for sending breast milk to daycare.
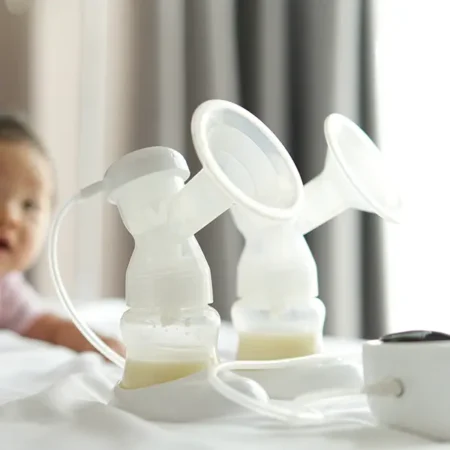
1. Prepping fresh milk
After you pump the milk, you need to prep the bottles for your baby to drink.
If your baby drinks out of the same bottles that you pump into, this will be super easy – just pour milk from one bottle into another until you have the right amounts in each. Then, screw on the nipples and caps.
I recommend prepping bottles the night before if you can – I usually did it as soon as I walked in the door, before putting them in my fridge. Anything to make mornings easier!
I would get three sets of bottles if possible – one to send to daycare, one to pump into, and one to wash. If necessary, you can do two sets and have the wash/pump into be the same, but then you may have to pack up bottles that haven’t fully dried.
Note: If your baby won’t take the bottles that came with your pump, see if you can screw the bottles that your baby will drink from into your pump. (For example, you can screw Dr Brown’s bottles into Medela pumps.)
If not, see if you can get an adapter and make pumping into your baby’s feeding bottles work that way. Here is a great comparison chart to help you figure out if this is possible with your breast pump/bottle combination.
Washing one set of bottles (versus a set for pumping and one for feeding) will save you so much time!
2. Prepping frozen milk for daycare
If you’re planning on prepping bottles with frozen milk, you have two options for thawing it – cold water or the refrigerator.
Thawing milk in the refrigerator takes 12-24 hours, so if you have that time, that may be easiest. Put the bags into a bowl to thaw in case of leaks.
If you don’t have that much time, use cold water. Just put the bags into a bowl of cold water and they should thaw in 10-15 minutes.
Once the milk is thawed, you pour the milk into bottles for baby to eat and screw on the nipples and caps.
Breast milk should be consumed or discarded within 24 hours of completely thawing. (The 24 hour clock doesn’t start when you take the milk out, it starts when it completely thaws.)
More on thawing breast milk here.
3. Labeling your breast milk bottles for daycare
Most daycares will want you to label your baby’s bottles with his or her name – obviously, you don’t want your milk to go to another baby (or vice versa)!
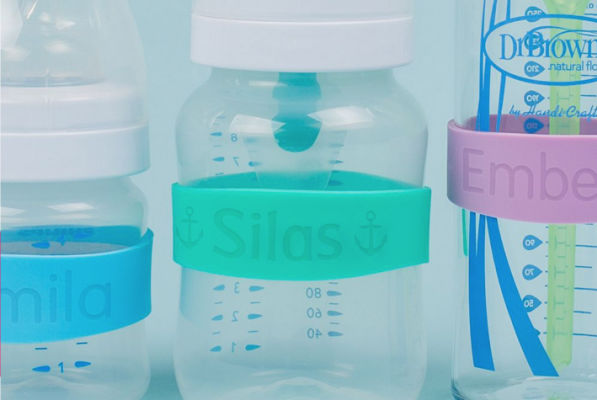
You can do this with a label like Mabel’s Labels (I used them and they are really cute!), or you can just put a piece of masking or painter’s tape with your baby’s name on the bottle.
Some people also like to label their bottles with the time their baby should take the bottle or the order that the bottles should be fed in.
This might be needed if baby takes different amounts at different feedings, or if a bottle will expire earlier in the day. (For example, if you drop baby off at 8am, and a bottle finished defrosting 20 hours ago, you’d want to feed it before noon.)
To do this, you can use tape (as described above), or a dry erase marker.
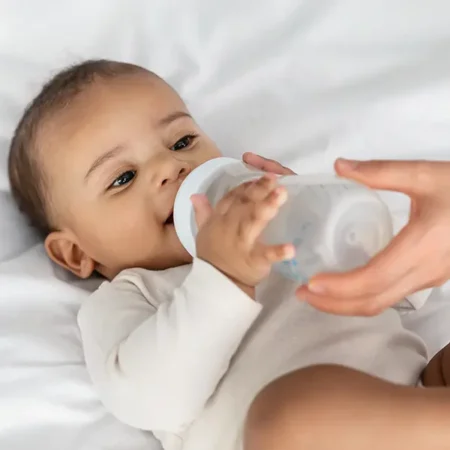
4. How to send breast milk to daycare
Once you have your bottles prepped and labeled, you’ll want to put them in some kind of bag to transport them.
If you have a short trip to daycare, you can just put the prepped bottles in a zip-top plastic bag. If you have a longer trip or prefer a cooler bag, you can get one like this:
I would put the prepped bottles in the cooler bag in the fridge overnight with the removable ice pack in the freezer, and then in the morning when it’s time to go, just pop the ice pack in the cooler, and you’re all set.

(More breast milk cooler options here.)
Should you feed fresh or frozen milk at daycare?
In the big picture, it doesn’t matter – do what works best for your family.
The only thing I would suggest is not to freeze milk if your daycare doesn’t require it or you’re going to use it within the next four days – don’t freeze it just to freeze it. Fresh milk will be fine in the fridge for for that long, it is easier to manage, and you don’t have to use a breastmilk storage bag.
How many bottles should your send?
A lot depends on your baby – it’s normal for a baby to eat 20 oz per day or 40 oz per day, so it depends on the individual.
It also depends on how long you’ll be away at work. You’ll obviously need more bottles if you’re a nurse working a 12 hour shift than if you work 8 hours a day with a short commute.
My kids were in daycare for 9-10 hours, and I usually sent four 4 oz bottles with them (about half the time, I got one bottle back). You may not need that much (my kids were big eaters), but hopefully that gives you an idea or a place to start.
What tips do you have for prepping bottles for daycare? Share them in the comments!


Comments & Chitchat
So helpful thank you!
Thanks for this article! Do you have any tips for prepping for that first day, essentially how to pump some extra bottles? I’m pumping only 1-2 bottles ahead of my baby, like the bottle I pump is either the next one he takes or the one after that. Should I do some power pumping sessions to get the 3 bottles I send to daycare?
Hi Elise! I think power pumping or maybe trying eating oatmeal might help give you a boost. I’ll link to more info on increasing milk supply that might help (I don’t think you really need to increase supply, but these might give you the boost you’re looking for). I hope this helps!
https://exclusivepumping.com/increasing-milk-supply/