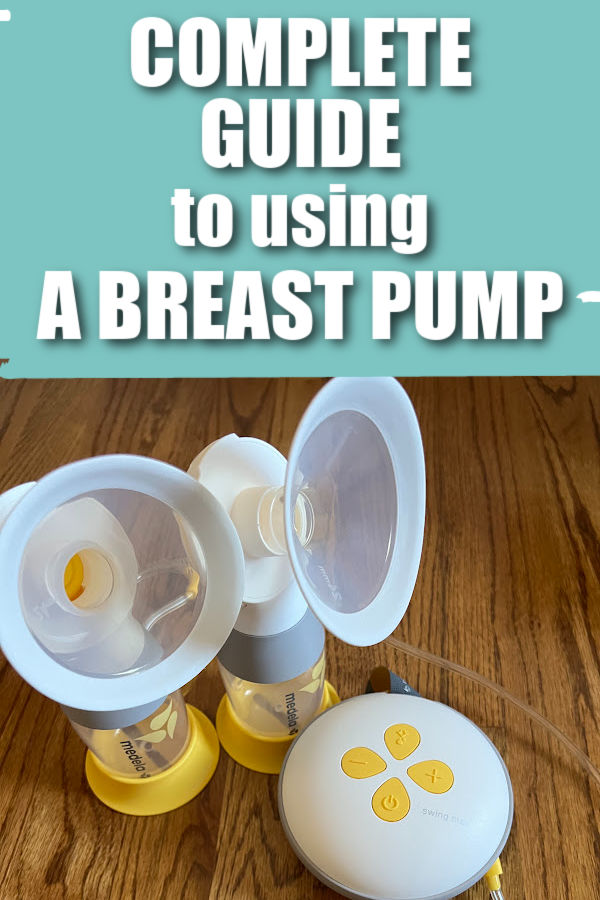
Just bought a breast pump and have no idea how the settings work or how to put the pump parts together? Here’s a complete beginner’s guide to using a breast pump!

This post may contain affiliate links, which means if you click a link and purchase something, I may make a small commission at no additional cost to you. I only recommend products I love! More information here.
Why use a breast pump?
Breast pumps are designed to mimic the sensation and suction of a nursing baby, as much as a machine can, in order to express milk from your breasts.
There are many reasons a new mom might use a breast pump, including:
1. Separation from baby
When you are not with your baby, whether that’s for work or for another reason, you may need to pump in order to maintain supply and collect/provide milk for your baby.
2. Exclusively pumping
If you decide not to nurse or are unable to, but you want to breastfeed, you can use a breast pump to provide milk for your baby.
3. Work on increasing milk supply
Breast milk supply is determined by the “demand” from your baby.
If you’re struggling to make enough milk, pumping can allow you to simulate that extra demand, which may help you increase your milk supply.
Essentially, the goal of your breast pump is to trick your body into thinking there is a baby trying to nurse, when nursing is not possible or desired.
If you don’t have a breast pump yet, it can be really easy to get one free through your health insurance. You can start the process here.
How does a breast pump work?
Traditional breast pumps have three major components – pump parts, tubing, and the pump motor/face place.

Let’s talk about each of these in more detail.
(Note: This article does not cover wireless or hands-free breast pumps. More on these here.)
1. Pump parts
Pump parts include breast shields, valves, bottles, connectors, and backflow protectors.
This is the part that actually touches your breasts and pulls the milk out using the power from the motor.
2. Tubing
The tubing connects the pump parts to the pump motor.
3. Pump motor/faceplate
The pump motor/faceplate provides the suction, allows you to turn the pump on and off, and allows you to adjust settings like vacuum strength and the mode.
It’s also where you plug your pump in.
Before you pump
Before you pump for the first time, make sure to sterilize your pump parts.

You can do this in a dishwasher, in a steam bag, or a few other ways.
Make sure to read your instruction manual to see if there are any parts that shouldn’t be sterilized.
More details on how to do this here.
How to use your breast pump
Here’s everything you need to do when you’re ready to use your pump, step by step.
1. Put together your pump parts
First, put together your breast pump parts.
Each breast pump manufacturer has different breast pump parts, so yours may not look exactly like the images below. (For example, your pump may have a valve membrane instead of a duckbill.) However, the structure tends to be similar.
Attach the valve and breast shield to the connector, and then screw the bottle on to the connector. If your pump has a backflow protector, you’d attach that to the connector, too.
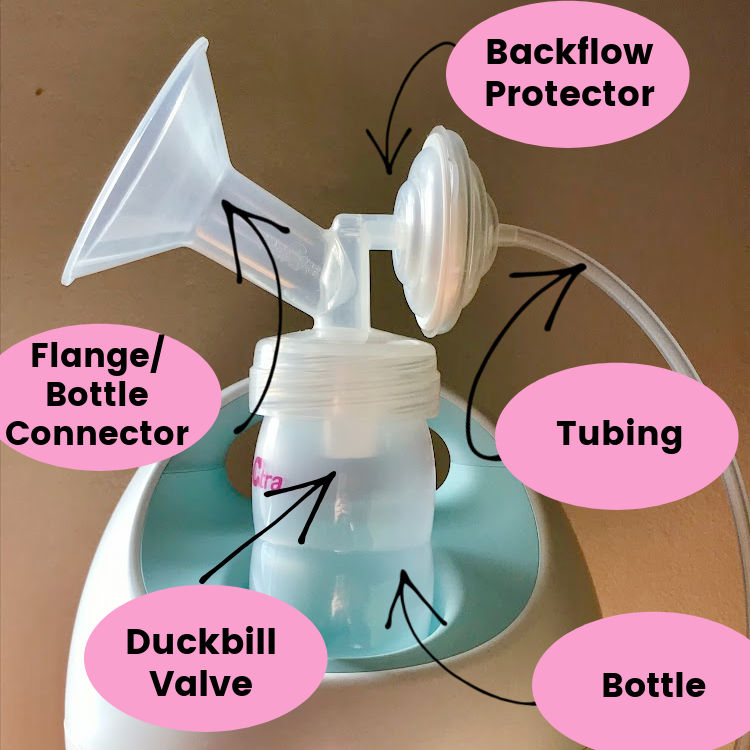
- Flange/Connector – The flange sits on your nipple, and the connector puts all the pump parts together.
- Valve/Duckbill – Creates the suction that pulls milk from your breasts by stretching and releasing each time the pump motor pulls.
- Backflow Protector – Prevents milk/moisture from getting into the tubing.
- Bottle – Collects the milk as you pump.
2. Attach the tubing
Attach one end of the tubing to the connector, and make sure the other end of the tubing is attached to the pump motor.

3. Set up your hands-free pumping bra and attach your flange
The flange cones sit on your breasts. You can hold them up the whole time if you’d like, but many people use a hands-free pumping bra so they can do other things.

4. Turn your pump on
Turn the pump on using the power button. You want to start in letdown mode (some pumps call it massage mode – more on breast pump settings here).
You should feel quick, light suction. You may see drips of milk start to come out of your breasts.
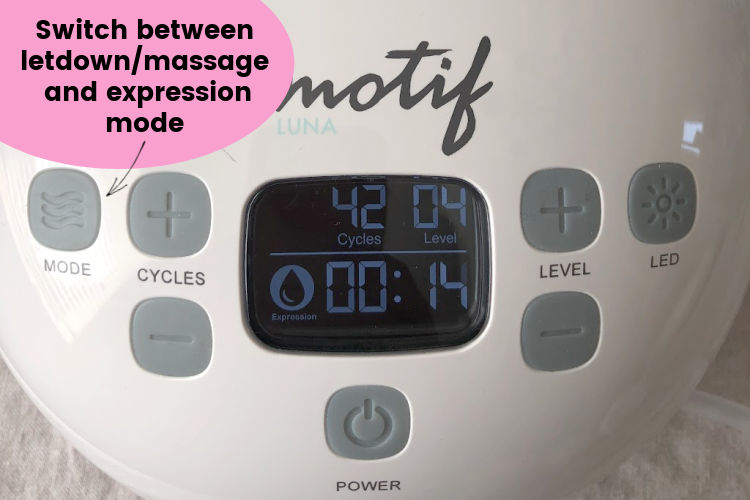
5. When your milk starts to let down, switch modes
Within a few minutes, you may feel your milk letdown. (This can feel like a pins-and-needles sensation for some women.) You might also see your milk start to spray.
When this happens, you can switch your pump to expression mode. Some pumps automatically switch after 1-2 minutes, so this may not be necessary.
6. Adjust the suction strength
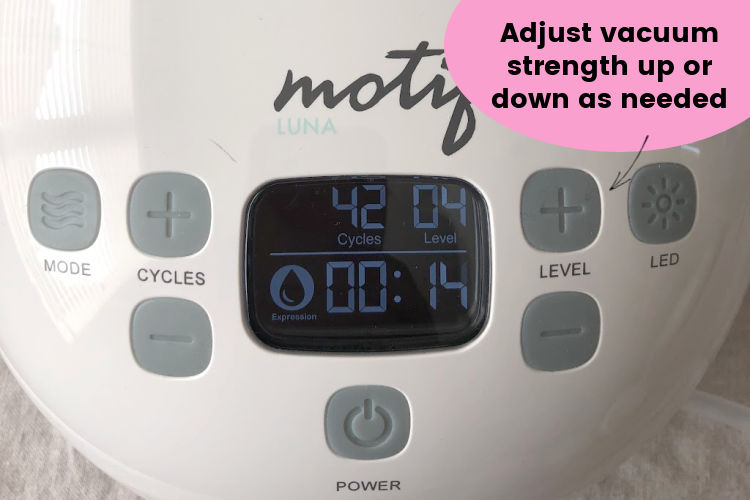
Set the vacuum strength to the highest level that is comfortable for you.
I suggest keep increasing the strength of the suction until you start to feel a bit of discomfort, and then dial back the suction one notch.
7. Continue pumping
Continue pumping for about 15 minutes (or however long you’d like, but 15 minutes is a good length when you are first starting to pump).
If you’re using a hands-free pumping bra, you can scroll social media, eat, or sit with your baby on your lap.
Need help with exclusive pumping? Use EPUMP30 for 30% off

After you pump
Here’s what to do when you’re done pumping.
1. Disconnect yourself from your pump
When you’re done pumping, turn the pump off. Disconnect the tubing from the breast shield connector or backflow protector.
Then, take off your hands-free pumping bra and carefully put your pump parts and bottles down.
2. Store your milk
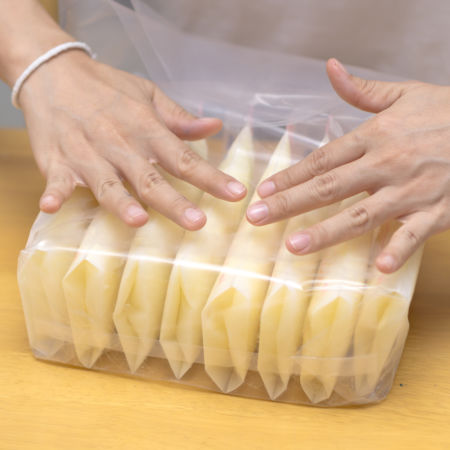
Then, unscrew the bottles from the pump parts, and store your milk. Your options are:
- Store it in the fridge
- Leave it out at room temperature if you plan to feed it in the next few hours
- Pour it into breast milk storage bags to freeze
More on storing your breast milk here.
3. Wash your pump parts
Finally, put your pump parts in the wash basin to be washed. (More on how to properly wash your pump parts here.)

How often and how long should you pump?
This depends on why you’re pumping.
- If you’re exclusively pumping, it depends on your baby’s age. You can see sample pumping schedules here.
- If you’re pumping because you’re separated from your baby, pump for 15-20 minutes, about as often as you would nurse.
- If you’re pumping to build up a freezer stash or increase supply, pump shortly after nursing (20-30 minutes or so) for about 15 minutes. Be careful not to overdo it, as oversupply can be a concern.
- If you’re triple feeding, pump for 15 minutes shortly after each nursing session.
Troubleshooting common pumping issues
Here are some common pumping concerns, what can cause them, and what you can do.
Pumping is painful
Pumping should never hurt. If you’re having pain while pumping, check the following things:
Breast shield size

Using breast shields that are either too small or too large can cause pain. If you’re having pain with pumping, you may need a different size.
Figuring out what size is best can be a bit of a challenge – some people measure their nipple with a ruler after pumping. If you’re struggling to find a size that fits, you can consider alternate breast shields.

Vacuum strength
As stated before, your vacuum strength should be set to the highest setting that is comfortable for you.
Pumping at a setting that causes pain won’t get you more milk; it will inhibit letdown and cause soreness and possible damage to your nipples.
Flanges centered
If your breast shields aren’t centered on your nipple, this can cause damage and pain. It’s a good idea to check this as you start pumping.
More on possible causes of nipple pain here.
Suction not strong enough
If you find that the suction doesn’t feel particularly strong when you’re pumping and not much milk is coming out (no matter how high you set the vacuum strength), try the following.
Check your pump parts
- Disassemble the pump parts and then reassemble them, and try again. Sometimes something can be slightly out of place.
- If your pump has backflow protectors, make sure that the diaphragms on them are properly positioned.
- Try a different set of pump parts (preferably dry ones).
Check your tubing
Detach and reattach the tubing on both sides. (If you have a double pump and one side is not attached correctly, the suction won’t work for the other side, either.)
Check your power source
Make sure the power source is securely plugged into the outlet and the pump.
More on breast pump suction here. If none of this works, call your pump manufacturer’s customer service and see what they suggest.
Milk getting in the tubing
How to handle breast milk in tubing depends on the type of pump that you have.
Open system pumps
If you have an open system pump (a pump without a backflow protector or other barrier between the pump parts and tubing), it’s not uncommon for milk or moisture to get into the tubing.
This isn’t a problem; you can just wash the tubing if this happens and hang it up to dry.

Most new breast pumps are closed system, however.
Closed system breast pump
If you have a closed system pump (such as a Spectra, Motif, Baby Buddha, and many more), the backflow protector should prevent milk from getting into the tubing.
If for whatever reason moisture does get into the tubing, in many cases, the tubing will need to be replaced as it’s not possible to sterilize it. Check with your pump manufacturer to confirm.
Not sure what settings to use

Some pumps allow you to set the cycle speed as well as the vacuum strength. If you have one of these, it’s a good idea to test out different speeds and see what works best for you – there is no one right speed for everyone.
Additionally, some women find that using letdown/massage mode the entire time they pump works best for them. It’s fine to do this if this is the case for you – you want to use the settings that give you the most milk.
The only real guideline I would stress when it comes to settings is to use the maximum vacuum settings that don’t cause you any discomfort.
I hope this helps give you a complete beginner’s guide to using a breast pump! Let me know if you have any questions in the comments.











Leave A Reply!