One of the challenging things about pumping breast milk at work is dealing with your breast pump parts. In addition to packing them and carrying them back and forth every day, you also have to constantly wash them. Here’s how to clean pump parts at work with the least amount of hassle.

This post may contain affiliate links, which means if you click a link and purchase something, I may make a small commission at no additional cost to you. I only recommend products I love! More information here.
Lots of people wonder if you can reuse breast pump parts, or if you need to wash your pump parts each time.
CDC recommendations for cleaning breast pump parts
The CDC recommends washing your breast pump parts after each use.
It does say that “[i]f you cannot clean your pump parts throughly after each pumping session, you can rinse and then refrigerate pump parts for a few hours between uses to help slow the growth of bacteria.”
How to clean breast pump parts at work
Based on these guidelines, you have a few options for how to manage your breast pump parts at work.
1. The “fridge hack” – refrigerate one set of pump parts in between sessions
Though the CDC is less than enthusiastic about it, this is the easiest option.
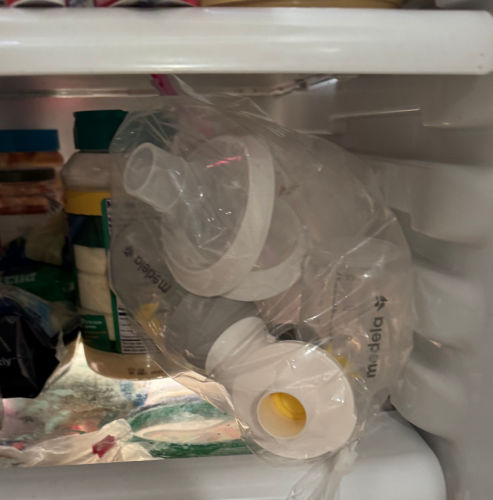
With this option, you bring a gallon-sized plastic zip-top bag or wet dry bag (like the Pumparoo), and put your pump parts in it after you’re done pumping and rinse them off. (Since it’s opaque, a Pumparoo might be better if you need to store pump parts in a communal fridge.)
When it’s time to pump again, you grab them from the fridge.
One downside is that when you take the pump parts out of the fridge, they are obviously really cold on your breasts.
2. Use one set of pump parts, and wash after each use
For this method, you’d need to bring some kind of wash basin and a bottle brush to work to wash everything in. You’ll also want to have some space for your pump parts to air dry.

The downside here is that this can be pretty time consuming. It can also be challenging if you don’t have a private sink in your lactation room.
Another issue is getting the pump parts dry after washing in time for the next session. In my experience, pump parts may work better when they are dry, and you might not have enough time in between sessions for them to air dry completely. If this is an issue for you, you can finish drying them with a clean paper towel.
3. Bring one set of pump parts for each pumping session, and wash them all at the end of the day.
With this method, if you pump three times a day, you bring in three sets of pump parts and use a new one at each pumping session.
At the end of the day, you wash all the pump parts in a big batch, so you don’t have to spend extra time washing after each session.
The con of this approach are that you have to invest in multiple sets of pump parts.

How to pack your pump parts for work
If you’re carrying your pump parts back and forth to work each day, I suggest packing them in a zip-top plastic bag or Pumparoo.
Putting everything together at home and then putting it in the bag makes it less likely you’re forget a crucial part. There’s nothing worse than sitting down to pump and realizing you don’t have your valves.
Can you keep your pump parts at work?
Another option is to just keep your pump parts at work all the time, washing them there. This can make things easier since you have less to carry on your commute, and you don’t have to worry about forgetting a part.
What if you forget a piece?
Even if you bring your pump parts home every night to wash them, it’s a good idea to keep a spare set at work if possible. Once I forgot my breast shields and tried pumping without them, putting my nipple right in the connector. This was a bad idea.
However, if you do forget an essential pump part and you can’t go home, you can try hand expression or see if you can pick up a manual pump at a pharmacy near your work.
Need Help Going Back to Work? Use EPUMP30 for 30% off!

How to wash breast pump parts at work
Here is how to safely clean your pump parts, step by step (whether you do it at work or at home).
You will need a wash basin, a bottle brush, some dish soap, and either somepaper towels. (Note: The wash basin is to avoid bacteria from putting the breast pump parts directly in a sink with food residue.)
Hopefully, you have a lactation room with access to a private sink and microwave, but if that’s not the case, the wash basin can actually make things easier, because you don’t have to monopolize a shared sink while you wash your pump parts.
- Put soap in the wash basin and fill it up with hot water.
- Take your pump parts apart – everything that can be taken apart should be. (I didn’t know this when I was a new mom and didn’t remove the valves when washing!)
- Put your pump parts in the wash basin, and wash each piece with a bottle brush that you only use for washing bottles and pump parts.
- When you’re done washing each piece, rinse it and put it on the paper towel.
- When you’re finished, dump out the wash basin and lift the towel (with your pump parts still on it) into the wash basin. Carry everything back to your desk or wherever you can leave them to air dry.

(Not sure how to wash your tubing? More on cleaning breast pump tubing here.)
Do you need to sterilize your pump parts after each use?
The CDC recommends sterilizing your pump parts once a day if your baby is less than three months old, is currently sick, or was born prematurely. (If your baby doesn’t fall into any of these categories, they say it may not necessary that often, but don’t give an alternate timeframe.)
Therefore, you don’t need to sterilize your parts in between each session. However, if you’d like to sterilize pump parts at work at the end of the day and have access to a microwave, you can do that with a sterilizing bag.
Do you have any tips for how to clean pump parts at work? Share them in the comments!
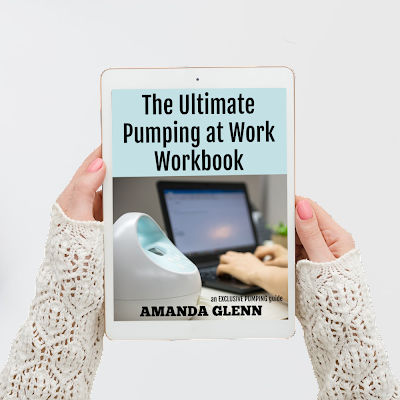
Nervous about pumping at work? Want help building your freezer stash, creating a packing checklist, and putting together a pumping schedule? Check out my Ultimate Pumping at Work Workbook here! Use EPUMP30 for 30% off.


Comments & Chitchat
I hope this helps someone. I don’t know how long I would make it if I had to clean my parts at every session! : ( My heart broke when I seen this recommendation: ( as I have a slow- letdown reflex and it takes me a half hour every time I pump. The solution for ME has been washing parts EVERY OTHER time I pump (I pump every 3-4 hours even in the middle of the night) and immediately refrigerate my parts and bottles in between. I base this off the logic that if breastmilk is safe for baby to drink at room temperature left out for 4hours- That same breastmilk residue left on the parts will likely be safe to drink at the next feeding. I will say I wouldn’t do this if baby was premature but my baby is 4 months now and was full term with no complications. I know that this is not 100% safe (nothing ever really is) but it is the best strategy I can think of for my mental health and my wallet.
I’ve been washing them with gentle liquid soap and after that I sterilize them. Sometimes if have plenty of time I boiled them too.
A 4th option is to buy quick clean wipes (Medela makes some) then can clean them without having to go to a sink (in a likely public kitchen space). Personally I bring 2 sets of pump parts, so I don’t have to take time to clean them at the end of each pump session. At the start of the next one I use the 2nd (still clean) set and then wipe down the first ones while pumping
Smart!
This is what I do – Im wary of cleaning anything in our break room sink.
I don’t think I’ve ever seen someone address this before. I was stumped about how to do it. I brought a tupperware bowl of soapy water to put them in between pumping sessions. Was that a bad idea? It worked, but I wish I’d read this post first!!!
Just seeing your question now, Nicole, so I’m guessing you got the answers you needed.
But for anyone who may stumble upon this later, here’s why *not* to soak your pump parts for long periods (and is the reason why the CDC made its cleaning recommendations more stringent):
https://www.mothering.com/articles/rare-infant-illness-causes-cdc-to-issue-breast-pump-cleaning-guidelines/