Not sure how to use your new breast pump? Here’s a step by step guide to using a Medela Pump in Style with Max Flow – how to set it up, how to clean it, and tips and tricks for getting as much milk as possible!
This post may contain affiliate links, which means if you click a link and purchase something, I may make a small commission at no additional cost to you. I only recommend products I love! More information here.
For years, the Medela Pump in Style has been one of the most popular pumps on the market. Recently, Medela introduced a new, upgraded version of this pump – the Pump in Style with Max Flow. Here’s everything you need to know about how to use it.
If you don’t have your Pump in Style yet, you may be able to get it free through insurance super easily here, or you can buy it from amazon.
(Have the older version of the Pump in Style? Here’s a post on how to use the Pump in Style Advanced that will be helpful for you.)
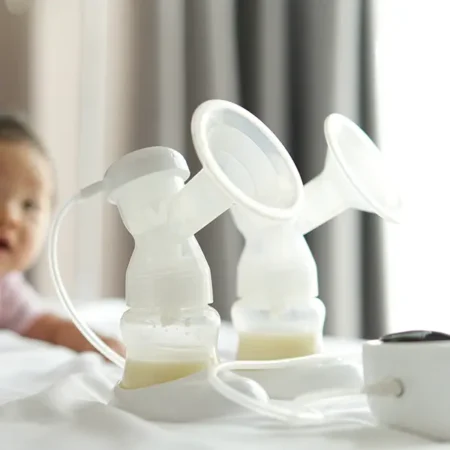
Here’s a story showing how it’s put together and works:

How do you assemble the Medela Pump in Style with Max Flow?
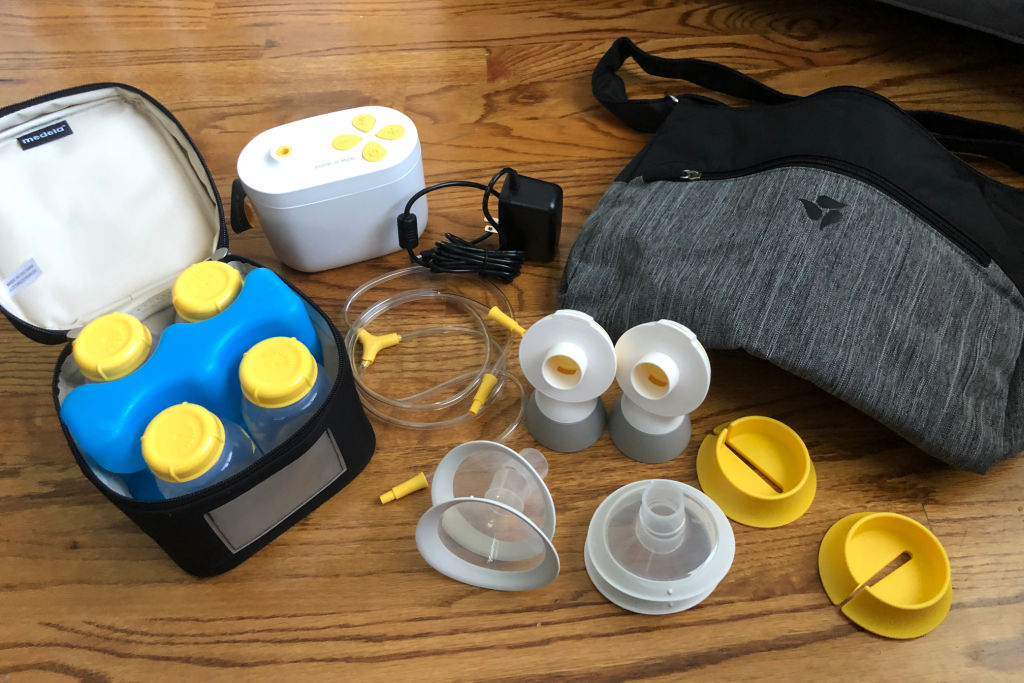
Here’s how the Max Flow looks with everything put together:

The difference pieces to put together include:
Breast shields
Breast shields are also called flanges (or “horns”) and are the part that fits on your breast.
Note that breast shields come in different sizes, and the size that comes with your pump might not be the correct size for you. (More on breast shield sizing here.)
Connectors
This piece connects together the bottles, tubing, and breast shields. It also includes the valve, which stretches and pulls each time the pump sucks.
Tubing
The tubing connects the pump motor to your breast pump parts. You can set it up to either double or single pump (more on this below).
Bottles
Your breast milk flows into the bottles as you pump. If your baby drinks out of bottles other than Medela bottles, you can try screwing them onto the connector (narrow mouth bottles may screw directly; other bottles may require an adapter like this one).
Pump Motor
The motor creates the suction that pulls the milk out of your breasts. You can adjust the levels of suction and the mode on the faceplate.
To put your Pump in Style together, connect each piece – the flange, the membrane, and the bottle – to the connector as shown in the photo above. Then attach the tubing to the connector and the pump motor.
You can also pump with Medela hands-free cups if you prefer:

How do you use the Medela Pump in Style with Max Flow?
On the breast pump, you’ll see the following.
On/Off Button
Press this button to turn the pump on or off.
Mode Button
The Medela Pump in Style has two modes: letdown mode (fast, light suction) and expression mode (slower, deeper suction). The mode button allows you to toggle between them.
The Pump in Style starts in letdown mode and automatically switches to expression mode after one minute. You can use this button to switch it sooner if you’d like, or switch it back if you haven’t let down yet when it moves into expression mode.
Suction Buttons
Push the – button to decrease the level of suction on the pump, and the + button to increase the suction.
Power Source
Plug your power cord (or battery pack) in here.
Tubing Port
This is where you attach the tubing from your pump parts to the pump motor.

To use the Medela Pump in Style with Max Flow, follow the below steps. (Before pumping for the first time, make sure to wash and sterilize your breast shields, connectors, membranes, and bottles.)
- Plug the pump in (either to an outlet using the power adaptor, or to a battery pack)
- Attach the tubing to the pump
- Put your bottles, connectors and membranes, bottles, and breast shields together (as pictured above)
- Attach the tubing to your connectors
- Place the breast shields on your breasts
- Press the power button to turn the pump on
- After the pump switches to expression mode, push the + to increase the suction to the highest level that is comfortable for you. (Keep going until you feel a bit of discomfort, and then push the – button once to decrease it so that you’re comfortable.)
How long should you pump? It depends on a couple of things – why you’re pumping (if you’re trying to build a freezer stash, are at work, are exclusively pumping, etc.) and how old your baby is. More on this here, but I would default to 15-20 minutes if you’re not sure.
What do you do when you’re done pumping?
After you’re done pumping, you’ll want to store the breast milk that you collected and wash your pumping gear.
How to Store Your Breast Milk
Remove the bottles from the connectors and either put the caps on the bottles, or transfer your milk to a breast milk storage bag if you plan to freeze it.
If you plan to feed the milk in the next few hours, you may want to just leave it out at room temperature. Otherwise, it makes sense to store it in the fridge or freeze it.
Much more on storing breast milk here.
How to Clean Your Pump Parts and Breast Pump
To clean your pump parts, take the breast shields and bottles off of the connectors. Open the connectors and remove the membranes.
Rather than wash your pump parts directly in the sink, fill a wash basin with warm, soapy water. Using a bottle brush that is only used for infant feeding items, clean the pump parts and any bottles you’re washing thoroughly.
You can also wash them in the dishwasher.
Wipe down your pump faceplate with a clean, damp cloth as needed.
More on washing pump parts and bottles here.
Sterilizing your Pump Parts
The CDC recommends sterilizing pump parts daily if your baby is under three months old, is currently ill, or was born prematurely. (If none of these is the case, they do not give a specific timeline for sterilizing but say it may not be necessary as frequently.)

More on sterilizing pump parts here.
Troubleshooting Issues with the Pump in Style with Max Flow
Here’s what to try if you’re pump doesn’t seem to be working, or if the suction isn’t as strong as it used to be:
- Make sure that the tubing is securely attached to the pump motor and to the pump parts on both sides. (If both sides aren’t attached, neither side will work.)
- Check that your power source is connected securely. If you’re using a battery pack and suction seems lower than normal, try plugging your pump into an outlet if possible and see if you notice a difference.
- Try taking your pump parts apart and putting them back together again. Sometimes the membrane isn’t in exactly the right spot.
- If your pump parts are wet, try a dry set.
- If it’s been a while since the last time you replaced your pump parts, try getting a new set. After a few months, they stop working as well (they might get microscopic tears, they can stretch, residue can build up, etc.).
If none of these tips works, I would recommend reaching out to Medela customer service via phone or live chat.
Additional tips for using your Medela pump
Below are some tips and tricks I would recommend trying to make pumping with your Medela pump easier.
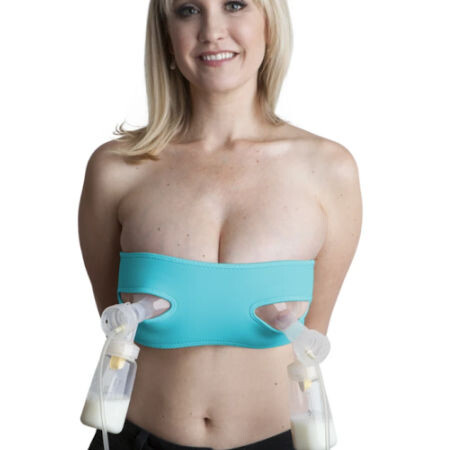
1. Pump hands-free
Pumping is much easier when you don’t have to hold up your breast shields the entire time. A hands-free pumping bra can free you up to do other things (work on your laptop, play with your baby, eat, etc.) while you pump.
Hands-Free Pumping Bras


2. Set a timer on your phone to track how long you’ve pumped
The Pump in Style doesn’t have a timer, so set a timer or an alarm on your phone. This way, you don’t overestimate the amount of time you’ve spent pumping (for me, it always feels like it’s been a lot longer than it actually has).
Note that the Pump in Style with Max Flow automatically shuts off after 30 minutes.
3. Get a battery pack if you will need to be mobile
If you’re only pumping at work in a lactation room with an outlet, you might not need this. However, if you are exclusively pumping, or if you ever travel for work, or even if you pump at home and don’t want to be stuck next to an outlet, a battery pack can be really helpful.
Some versions of the Pump in Style with Max Flow come with this battery pack:

If yours doesn’t, you can buy it separately or try a car adapter. More on battery packs here.
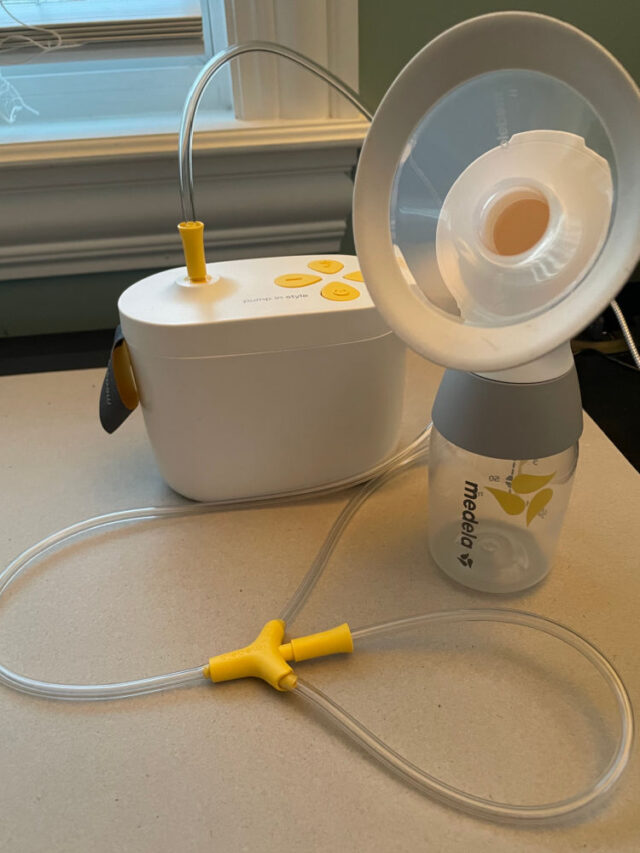
4. How to Single Pump with the Max Flow
If you want to just pump on one side, attach one side of the tubing to the connector, and the other to tubing holder.
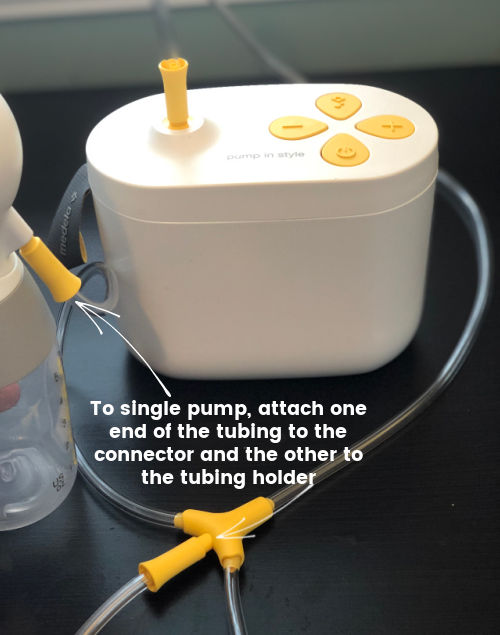
(If you just leave it unattached, there won’t be any suction.)
More on single pumping here:
That’s what you need to know about how to use a Medela Pump in Style with Max Flow! Have any questions that I didn’t answer? Leave them in the comments below!


Comments & Chitchat
Can you use the regular flanges from the symphony with this pump? The flanges provided with the pulp do not work for me.
I’m 95% sure that yes, you can swap the flexfit flanges for the old Medela flanges. I couldn’t find any of the old flanges to test with, but I feel like I have tried this before. Sorry that I can’t be 100% sure!
Hi! Great article. I have this pump but I am running into major issues thinking about how to use it in the car! I emailed Medela as it seems the 9V car adapter is not compatible with this version of the pump- they confirmed that there is not currently a car adapter and reviews of the Medela 9V car adapter state that the cord does not plug into this pump. I saw a product that converts the car outlet to a standard outlet- do you think this could work? Or I bought 8 rechargeable batteries for the battery pack but that just seems like more work to frequently be charging and moving 8 batteries. Thoughts?
Hi Christina! Interesting – do you have aa link to the product that converts the car outlet to the standard? Would love to check it out! The 8 battery thing works but is super annoying with always having to change out the batteries.
Hi Amanda, I posted the link below. I was also able to find a set of 8 rechargeable batteries but yes I agree feels silly to have to physically move 8 batteries back and forth.
Thank you!
FOVAL 200W Car Power Inverter DC… https://www.amazon.com/dp/B074KWP2HJ?ref=ppx_pop_mob_ap_share
I have this pump as well as the Motif Luna and the Motif car adapter works for this pump as well!
Hi
Hii how often does tubing needs to be changed in pump in style max flow Medela pump?
Thank you
Hi Tia! No need to change unless damaged. 🙂
Thank you so much for the easy tutorial! I’ve been using this as my main pump but got the Baby Buddha for travel. I saw you other post about hacking it but I’m having trouble with the Medela tubing. How did you disconnect the yellow tip to replace it with the white Baby Buddha one?? Mine seems really stuck on there.
Hi Jess! Some people can get it off by pulling really hard, others buy an extra set of tubing and cut the yellow piece off. More on this here:
https://exclusivepumping.com/spectra-to-medela-adaptor/
How often do the yellow membranes need to be replaced for the pump in style max flow
Hi Adrienne – Medela says they only need to be replaced when damaged, but I would also do it if you think your pump is starting to lose suction. Hope that helps!
Hi,
Can the Medela pump in style max flow be used with the freemie closed system collection cups?
Can we use our old Madela parts with this new pump? I have tons of the duckbill type from last babe and don’t want to buy all new parts.
Thanks
Hi! I don’t think so – the new parts are closed system and the old parts are open. Using them without a backflow protector could invalidate your warranty. You could probably hack them with a backflow protector but I’m not 100% sure
Is there a bag adapter that fits on this pump? I’m hoping to pump directly into bags but having a hard time finding the right adapter.
FTM here and completely new to the breast pump world…just got my Medela Pump In Style Max Flow from my insurance co. and trying to prepare by ordering some replacement parts to have on hand. Sooo confused by the valve and backflow protector situation. It looks like the “valve” is built-in to the bottom of the yellow backflow protector – is that right? So to replace, do you think I’d need to purchase a brand new connector each time? I haven’t been able to find the yellow backflow protectors/valves for sale separately. I keep hearing about duckbill valves but it seems like that doesn’t apply to this model since the valves are built-in to the yellow backflow protector. Any insight on this!?
Hi Kim! Yes, there are only the two parts – connector and valve/backflow protector. I would order a couple of extra so you have multiple sets but yeah, to replace them, you have to order the whole thing. Medela says you don’t have to replace these as frequently but we’ll have to see. Duckbill valves don’t apply with this pump, so don’t worry about those! Hope this helps!
How would i build my milk supply? I’m 8 weeks postpartum officially back at work and failing miserably at exclusive pumping. I breastfed my son for about 2 weeks with little luck i wasn’t making enough milk at first and since my parents were helping they started giving him a bottle so i went to exclusive pumping because my son stopped latching. I have only ever been able to pump about 4 ozs in a whole day please help me. I’m taking supplements, lactation drinks, adding brewers yeast powder to everything i eat and drink. Ive been trying hard to pump every two hrs I’m drowning and depressed by the few drops i get every session.
Hi Sydney! I’m so sorry – this sounds so frustrating. Can you tell me what you schedule is like and what pump you’re using?